This is a huge topic. I have maintained an extensive list of all tool purchases, but I’ll only touch on a few highlights here. I may add a separate page with some recommendations in the future.
In this post, I’ll cover my specific constraints, certain tool choices, and the resulting workspace layout.
Constraints
- Van’s Aircraft and many others recommend building in your home’s 2-car garage when possible. The thinking is that removing a commute will allow more free time to go into building rather than driving, and more flexibility for shorter sessions to maintain momentum. This is valid, but the reality is that dense urban areas like the SF Bay Area have tight real estate markets and not everyone has access to a garage and driveway. While we do have a garage, there is no convenient alternate place to park our cars. It will be necessary to build in the hangar at Reid-Hillview.
- The airport is slated to close in 2031, which creates a bit of a time constraint. I’ve also been on the hangar waitlist at Palo Alto airport since 2019 and I’m #8 as of this writing. My best guess is that will be a 5 year wait too. I figure that a 2000-hour build / 8 hours per week = 5 years, which seems realistic.
- The hangar has only two electrical plugs and tenants are not allowed to paint (or prime) in the hangar.
- I currently own a Citabria, which will take up most space in the middle of the hangar for a while.
Tools
I spent a couple months buying and setting up all the tools I’ll need to build the plane – everything listed on the Van’s website and, frankly, much more that I learned about from VAF forums, during an EAA workshop, and in doing my own research. Of course, the caveat is that a tool collection is never truly “complete.”
Some of the more notable tool choices:
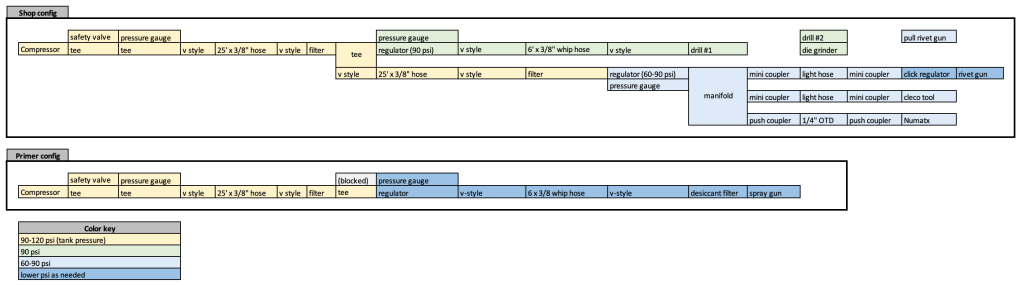
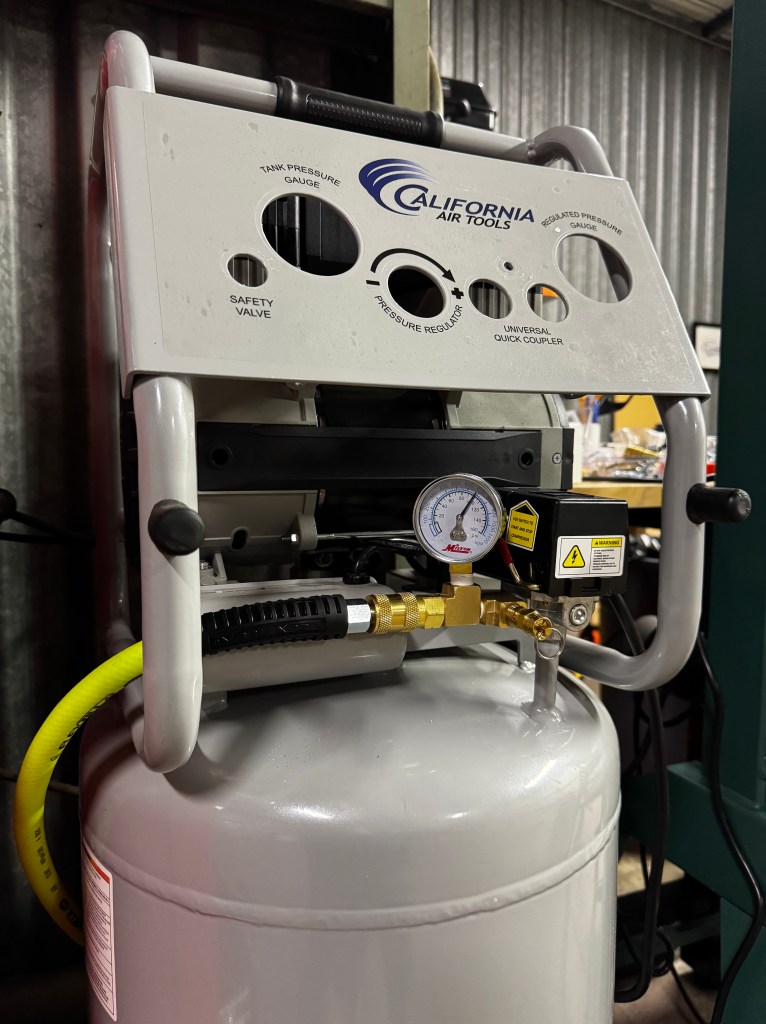
- California Air Tools compressor (20020) – the heart of my pneumatic system and probably the most powerful compressor that will run on the electrical system in my hangar. I also like that it’s oil-free for priming and I’m happy with its noise level. As for performance, it’s good enough now that I’ve bypassed its pre-installed manifold for better airflow. Also installed very high-performance fittings, hoses, filters, regulators, etc throughout the system.
- Numatx squeezer – my biggest tool investment and I am excited to use this for squeezing rivets and dimpling. There are a few benefits over pneumatic squeezers like weight in hand plus full power throughout its stroke.
- Rivet guns, tungsten bucking bars, 2x 4000 rpm Nova drills, die grinder, air cleco tool
- Milwaukee M12 drills, die grinder, screwdriver, ratchet, etc + Dewalt gyroscopic screwdriver
- DRDT-2 – mixed feelings about this one. I was excited at first but then I became aware of Clemson Aeronautics and their CARD product, which can handle dimpling and riveting up to a 22” depth. So I’m feeling some FOMO.
- Metal-cutting band saw – a lot of builders will tell you that a regular wood cutting band saw with minor modifications works fine. I decided that the proper tool was worth the investment; not sure yet who’s right.
- Bench grinder, drill press, and 1” belt sander – went with mid-range WEN stuff
- Basically every Cleaveland-exclusive tool and lots of Avery stuff too
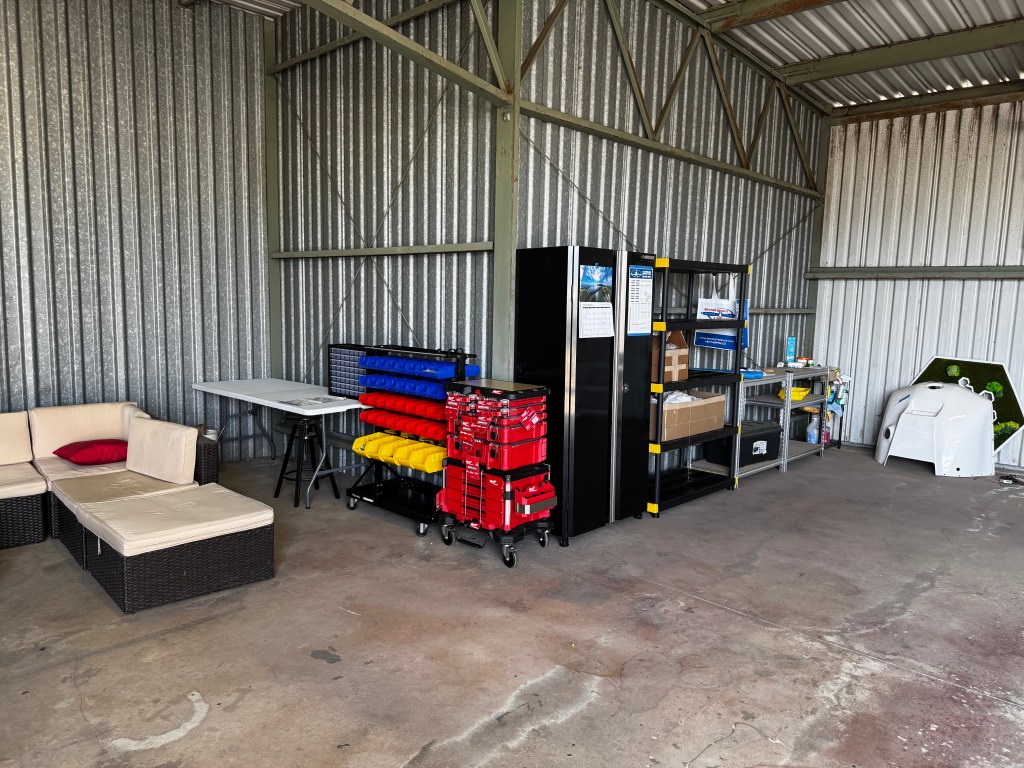
- Organization: Milwaukee packout system, IRIS drawers, shelving, HF rolling bins, and (my favorite) Fiji water bottles for rivets
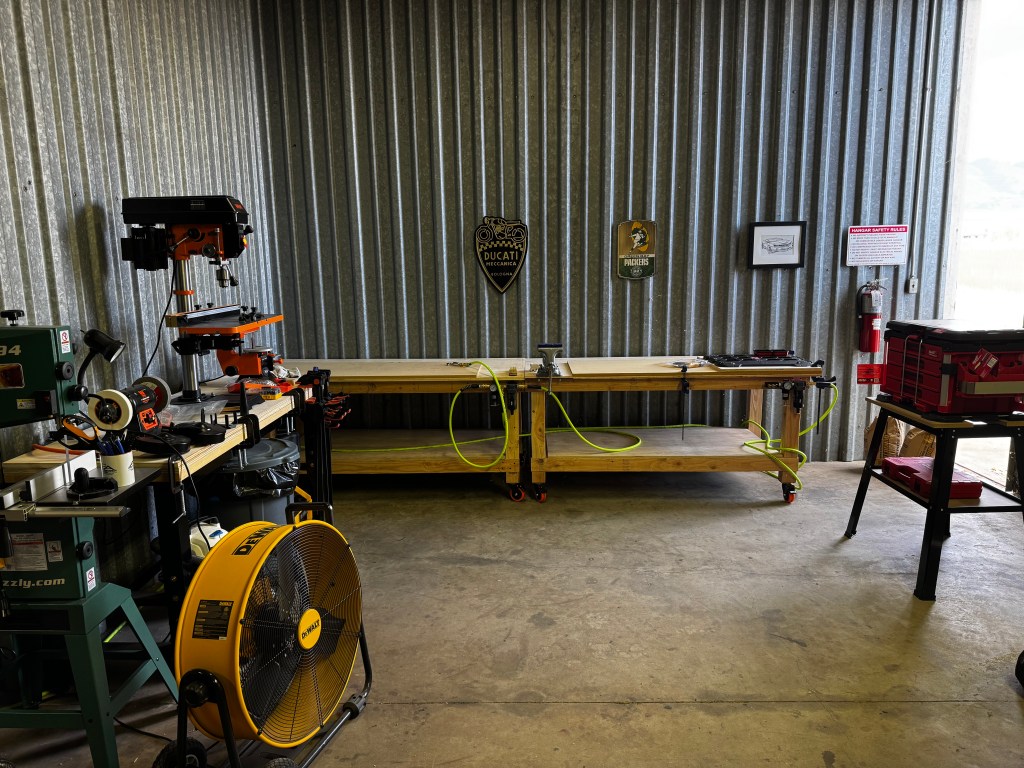
- Four workbenches
- 6’ x 3’ EAA 1000 style on casters. Whip hose for drilling and deburring.
- 6’ x 3’ EAA 1000 style on casters. Vise (secured to a steel plate below bench top) on left, manifold on right for rivet gun, cleco/layout, and squeezer.
- 6’ x 2’ Husky for bench grinder, drill press, and belt sander
- 5’ x 2’ EAA 1000 style. Extra shelf. Dedicated DRDT-2 bench.
Workshop layout
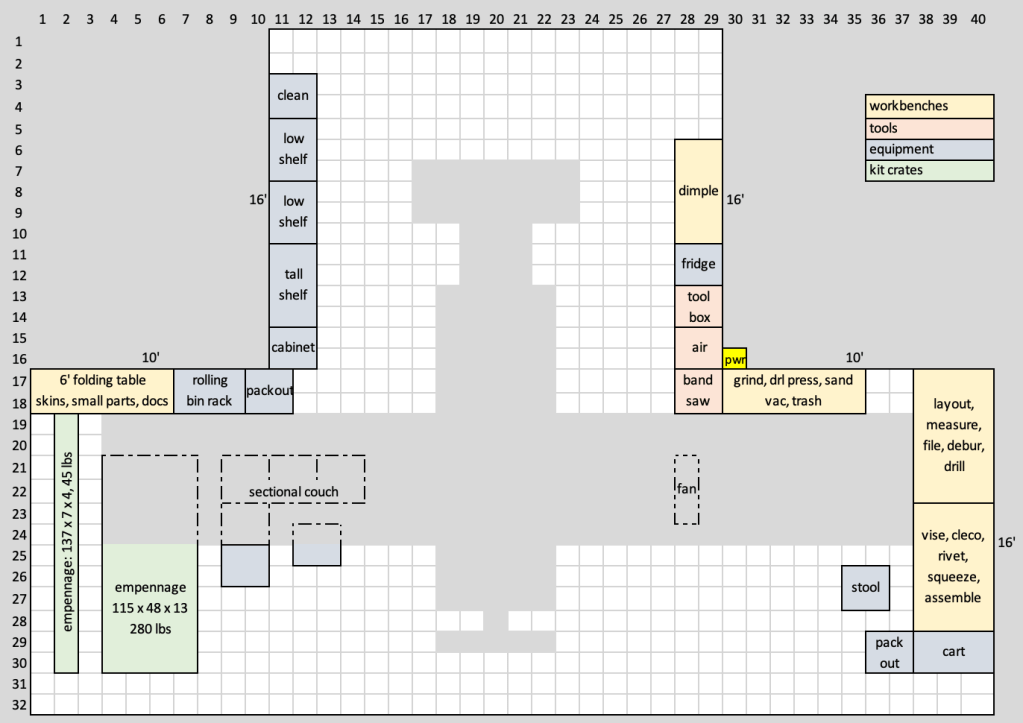
Pneumatics
Result

Leave a comment